When you learn to snowboard, it’s best to do it in the right order. For example. I wouldn’t recommend launching yourself off a black kicker in the park on your first day. Trying to run before you can walk can be very dangerous. If you start from the very beginning and stick to a plan, you will end up a way better snowboarder in the long run and your progression will be a lot more efficient. Harder techniques will be easier to learn later on if you have mastered the basics first.
There is no rule on how fast you should progress. You might be like “Chalet Girl” and progress from total beginner to competition rider in one season (although this is a film and the tricks she does are not physically possible), or you might take your whole lifetime to be able to link your turns. It really doesn’t matter. You might not even want to progress at all and be totally content just being able to get from A-B (pub to pub!?)

I am not an instructor, but here is a rough order in which I recommend to learn things and a suggested order of your progression path. If you feel you are already at a more advanced level and are joining later on in the progression path, there is no shame on revisiting an easier stage just to make sure you have everything in place.
You can also use the timeline to help give you something to aim towards e.g. “I want to be able to spin a 360 off a park jump”. Check back on the list and make sure you can do all the skills previous to this so you are ready, then you can work on the new skill. Once you have the snowboard basics down, you can take snowboarding in any direction you fancy (cruising piste, off piste, park, back country, racing…) Thats the amazing thing with snowboarding, the scope is massive.

GETTING STARTED
Equipment: Before you can do anything, you need some gear. Unfortunately, quite a lot of gear. It doesn’t really matter at the start if you’re renting or borrowing stuff, it’s actually a good idea to test out snowboarding first to make sure you like it before you buy all of your own equipment. The essentials are: snowboard, boots, bindings, goggles/ sunnies, hat, helmet, gloves, jacket, pants, socks. A fashion parade at home in front of the mirror (maybe in private) is totally acceptable!
Setting Up: Make sure all your equipment is set up correctly and you know how to use it. How do you lace-up your boots? How do you do up your bindings? Have you got the right sizes? Are you set up regular or goofy (plenty of “tests” to figure this out)? Have you got the correct lenses in your goggles for the weather? Do a practice run strapping into your gear at home first to make sure you know how to use everything. A more experienced snowboarder can help you out and make sure you’re doing it right. This just saves time on the mountain and stops you looking like a complete novice on the first day.

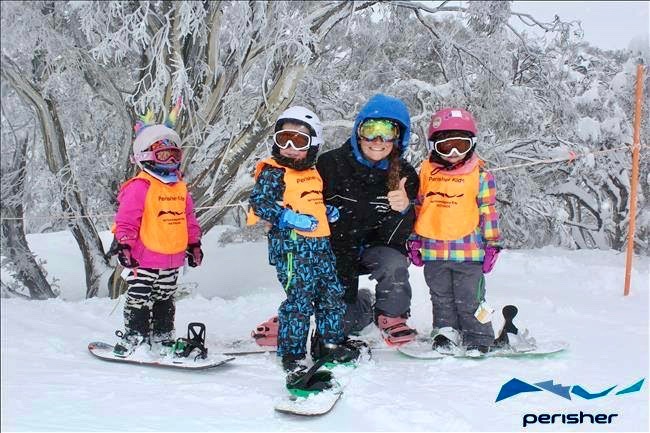
Instructor/ Lessons: Decide HOW you are going to learn to snowboard. Are you going to hire an instructor? Group lessons or private? Or just bribe a mate with beers to teach you the ropes?! I would honestly recommend lessons at the start to make sure you learn everything correctly.
Standing Up: I know it sounds silly but people often underestimate how hard it is to actually stand up on a snowboard for the first time, especially if you haven’t done any other board sports before. It can feel really alien having your feet strapped down like that. So just practice going from sitting down on your board to a standing position. Play around with bending your knees and altering your posture to get the idea of balance. I literally couldn’t even stand up on my board my first day!!!
THE BEGINNING
Nursery Slope: This is definitely where you should start. They are nice and mellow and full of other beginners. Start by just walking up the side of it and coming down.
Balancing: Experiment on the flat with shifting your balance from your toe edge to heel edge, and then from your right foot to left foot. Seems pretty basic but its a useful thing to do.
Skating: Still on the flat, try skating around with your leading foot attached in your binding, your other foot can go behind or in front of your board to push you along. Once you’ve got this, try resting your other foot on your board on the inside of your binding and gliding along. This skill will come in really useful when getting on and off lifts.
Heel Edge: Walk up the nursery slopes and practice side slipping down on your heel edge. Use your ankles to vary and control how much edge you put into the slope to slow yourself down and stop, and then release it to slide down the slope. Increase the distance until you feel comfortable that you have control and ability to vary the speed.
Stopping: An essential part of snowboarding! Learn how to stop by using either your heel or toe edge. Heel edge is way easier at the start. If in doubt, just fall into the slope and that will work too!
Falling leaf: Try pointing your board slightly down the hill so you get some speed (not too fast though) and then bring your board back around to your heel edge to slow down. Do this with each foot so you are gliding down the slope… like a falling leaf!
Lifts: Getting bored and tired hiking up the nursery slope?? Might be time to get acquainted with the lifts. On a nursery slope you can often find a Magic Carpet (REALLY easy way to get up), a button lift, a T-Bar or a small chair lift. All have their challenges at the start. It’s well worth watching other riders and see how they tackle them, and asking for tips from your instructor/ friends. Don’t be embarrassed if it all goes wrong, EVERYONE at some point has had an “issue” with a lift – I fell off a chair lift once in front of Torah Bright (true story).
Control Speed: Learn how to control your speed. Play around with the falling leaf technique, going faster and slower. As long as you know how to stop you’ll be fine testing your speed.
Traverse: Work on travelling across the slope on your heel edge and then your toe edge. You will most likely favour one side, but don’t forget to work on both.
Linking Turns: You instructor/ chosen tutor will talk you through this. Once you have this, the world is your oyster. This is a massive accomplishment, you’ll feel like after all the falls and hard work, that you’ve finally got it! In many ways speed is your friend when you start to link turns as you will find that it flows easier. So try hard to build up a bit of speed and go for it!

THE MOUNTAIN
Green Runs: When you’re feeling competent and ready for the next challenge (and to get off the nursery slope), its time to head onto the rest of the mountain. If you can hold of a piste map, that will tell you all the ski runs that are available to you and how difficult each one is. They are graded with colour, the best one to start with is a green run. This is the easiest one and good for beginners. It will be very similar to the nursery slope you are already used to.
Blue Runs: These are the next step up, but still extremely mellow. They are normally well groomed, wide and have a gradient less than 25%.
Red Runs: These runs are a little steeper, with a gradient of 40%. They are narrower and a lot more challenging. Suitable for intermediates.
Black Runs: The most difficult runs, for advanced riders. They vary from resort to resort: some may be pretty scary where’s others may not seem too different to a red run. Demanding terrain and STEEP.
Linking Turns at Higher Speed: Now you have perfected your turns, now you can start adding speed into them. You can experiment on a different variety of slopes and at different speeds. You could do quick short turns, long slow turns or even no turns at all (as long as you know how to stop). Just build your confidence up slowly, and soon you’ll be blasting around the mountain and find that you don’t have to concentrate as much on the turns as they just come more naturally.

Different Types of Snow: On the mountain you will come across different types of snow. Make sure you give it all a go! For example, icy, powder, moguls, hard packed, groomed, wet, slushy etc. The more variety of snow you can ride, the better all round rider you will be.
Carving: This is a fun technique to learn and a good way to test out your edges. Really concentrate on pushing your toe/ heel edge into the snow when you turn. If its a good carve, you will feel it as it will give you momentum and powder. Carving can be good for speed and racing and gripping in icy conditions.
Riding Switch: Do everything you have ever learnt, but with your “wrong” foot leading. It’s ok to go back to the beginning (including the nursery slope) and learn it all again but the other way round. Believe me, being able to snowboard both ways is SUCH a good skill to have.
FLAT LAND JIBBING
Basic Freestyle Tricks: Working on basic freestyle tricks on the piste will help you understand how your board works and what you can do with it. It will also help balance and co-ordination and give you a good base for learning moves in the terrain park, if thats the way you want to go. Jibbing is also really fun and can make a run more interesting. Start learning little tricks whilst you are stationary, then you can do them on the move when you’re ready.
Presses: A good place to start are with nose and tail presses. Great for giving you balance and to learn how flexible your board is and where the “pop” is. Do this on the flat to start.

Buttering: Now you can play around with the presses at speed: do them whilst moving, pop from one press to the other, spin round in the press, the options are endless!
Ollies: The next thing to tackle, and a snowboard ESSENTIAL, are ollies. These allow you to work your board in the right way to make you jump. Practice little ones on the flat, then at speed, then try them off little moguls and piles of snow going down the piste.
180s: All 4 ways….backside, frontside, switch, switch backside (the hardest!). Again start on the flat, working your way up to speed and then off little piles of snow. Youtube them first to find out which is which.
Grabs: Experiment with different grabs (grabbing different parts of your board with different hands). Ollie first, and then grab. A LOT easier to do with some momentum and height.
Piste Jumps: Now you’ll find these everywhere, you just have to keep your eyes pealed. There will be little mounds of snow you can practice jumping off at the sides of the piste (where the slope meets the “off-piste”), also next to trees, or just literally little bumps/rollers down the actual piste. You can try ollies off these, 180s/ 360s and lots of different grabs.

PARK RIDING
With all this flat land jibbing, the natural progression is to take some of your new moves to the park. Take everything in baby steps though. The park features will be graded in a similar way to the pistes (Green, Blue, Red, Black), so start with the easier ones and work your way up.
Boxes: Nice, wide, easy, ride-on boxes are a brilliant way of introducing you to riding metal. First try 50/50s, keeping a totally flat base and keeping low. Experiment with presses next. Once you have these, you can try going sideways. Boxes come in an array of different styles, eg, A-Frames, Whale Tails, Butter Boxes, Rainbows etc. so try them all!
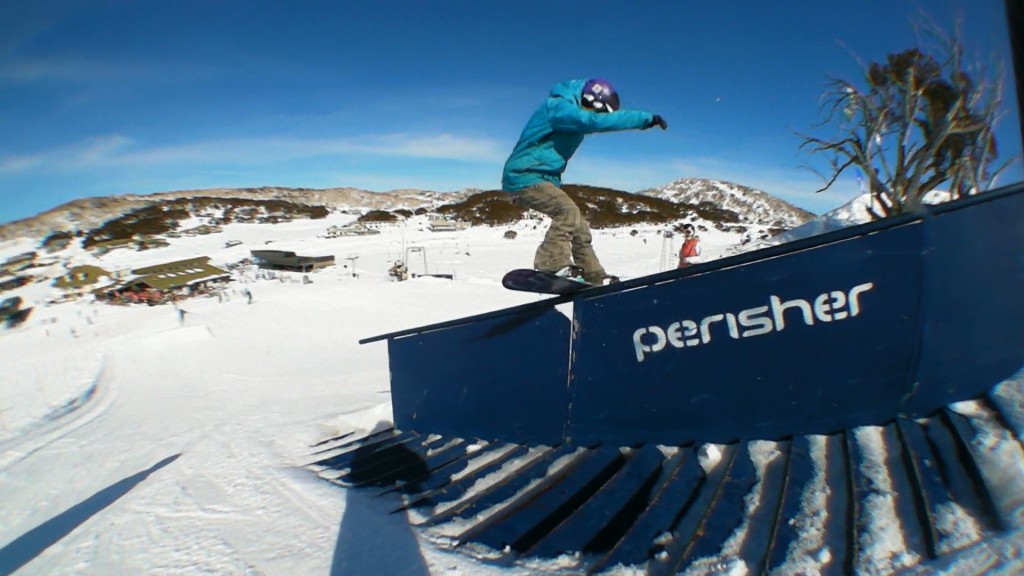
Rails: Thinner pieces of metal to slide across. Start with ride-on straight ones, then ones where you have to ollie onto them, then side hit ones. Like the boxes, these come in a huge variety of different shapes, sizes and difficulties.
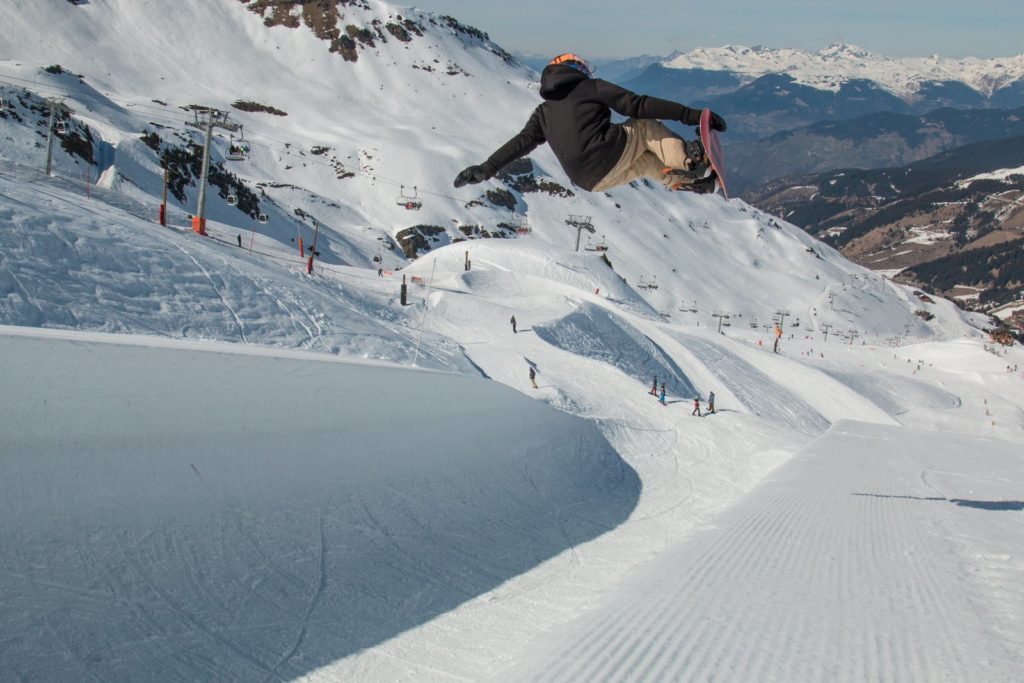
Jumps: Start with the rollers of the jumps, then the little blue ones, working up to the red ones, and eventually the big black ones. Always make sure you have your speed right and your take-offs and landings sorted. Begin with straight airs, then grabs and then once you are confident… spins (180s first). You’ll probably discover that you have a favourite way of spinning, but don’t forget to wok on your less confident ways too. Sometimes a switch back 180 off a blue jump can be just as scary as a frontside 5 off a black jump!
Hips: These are jumps that you take from the side. Its important that you aim your take off well so you land in the transition properly. Great for doing huge grabs off, especially methods!
Other Park Features: There will be so many other items in the park for you to play on: wall-rides, stair-sets, road gaps, quarter pipes, rhythm sections… to name but a few. Each park is different, some more creative than others, but all pretty fun.
Pipe: Another discipline all together but still in the “Freestyle” category. These also come in different sizes, a mini pipe is great to learn in. Start by just riding the transitions of the pipe, then you can try and air out of the coping at the top (with a grab?!), then introduce some small spins.
THE BIG MOUNTAIN
Powder: The snowboarders ultimate dream… untouched powder. It feels like floating through white fluffy clouds. A totally different technique to riding the piste. Lean back with weight on your back foot, less use of edges and more use of body weight. Best feeling ever when you get it.
Off-Piste: Now you are ready to venture into the off piste parts of the mountain to try and score some powder. These are any parts of the hill that aren’t dedicated runs and marked out by piste poles. You have to be very careful off-piste as its not groomed and not as safe as pisted runs. But with this danger, comes a whole new world and a whole lot of fun.

Cutting In And Out: This is a good place to start dabbling in off piste. Just head towards the side of the run where the piste meets the off piste. Nip off the side, exploring uncharted territory, keeping the run in view so you can quite easily cut back in if you need to. Test the waters so to speak.
Hiking: Now you’ve tested the waters, you are ready to hike further a field to find good stashes of powder. These hikes will often start off the side of the piste and take you up the side of a mountain face to find fresh snow. Its important here to know your mountain and know your snow conditions. I would hugely recommend wearing a transceiver (and know how to use it) and going with someone knowledgable. Hikes vary in length/ difficulty, so start with short mellow ones and progress your way up.
Tree Riding: Tree riding is great for bad weather days when the visibility is poor on the mountain. Trees add definition to your vision and are sheltered. Weaving in and out of the them is quite a skill and requires quick reactions, agility and precision. Start off taking it slow and eventually increase your speed.

TOURING
Into The Backcountry: This is learning to take the big mountain/ hiking/ powder stuff to the extreme. It’s all about venturing into the back country, far away from anyone and anything, finding the ultimate faces of fresh snow to ride. The hikes can be long and exhausting… but very rewarding. Not only do you have to be advanced in snowboarding to do this, but your fitness and stamina has to be pretty good too.
Know Your Equipment: You DEFINITELY need a transceiver, shovel and probe for this and be very confident in using it. Not only for yourself, but to be able to help others if you are faced with that situation. This sort of snowboarding requires different equipment again, a split board. This is a snowboard that breaks down into 2 skis that you attached skins onto to help you walk up the mountain. They then re-attached together at the top for your descent down.
Snow Conditions: You MUST know about different snow conditions, weather and avalanche safety before you tackle the backcountry. Sometimes going on a course to learn all this is the best way to have all bases covered.

TAKING RIDING TO NEXT LEVEL
Competition Riding: Once you have got all of your skills in place, you are probably ready to put them into action against other people. You can compete in every discipline of snowboarding: Slalom/ Freestyle/ Pipe/ BoarderCross/ Back country/ Freeride/ Rail Jams/ Big Air/ Filming Comps/ Valley Ralleys etc. Competitions might not be your thing at all, but it’s a good thing to feel like your challenging yourself and giving you something to aim towards.

Filming/ Photos: Another fun way to continue to push your riding is to get involved in film/ photo projects. I always feel I ride better when I’m trying to get a shot. These can just start off by you and your mate taking photos/ films of each other on your Go Pro, then progress into making full length movies/ getting magazine shots with proper equipment and professional filmers/ photographers.
Become An Instructor: What better way to take your riding that little bit further, by imparting all of your knowledge and wisdom (!!) onto others. There are lots of courses out there to help you get trained up and qualified. Ticket To Ride in particular have some amazing ones that run world wide and help achieve that ultimate Instructor status.
World Domination: If you can tick all of the above things off the list… you are a pretty good snowboarder, and possibly ready to take over the world.
